

Autumn Landscape Photography: Color, Weather & Timing
Oct 18, 2026
By Artistic Creationz Photography Journal · Published October 18, 2026
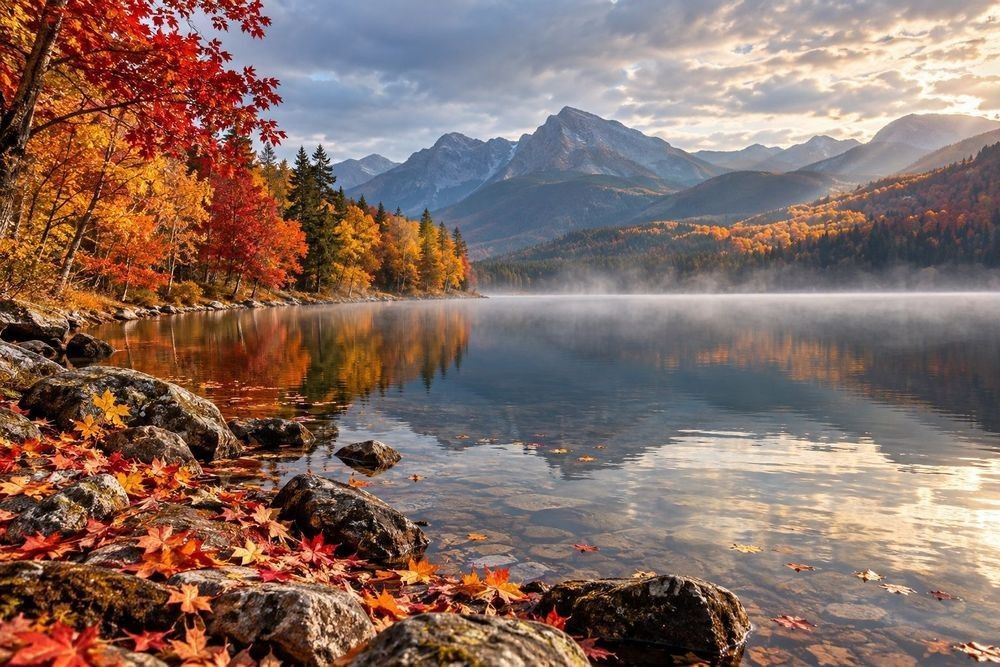
Autumn landscape photography begins with noticing how a place is changing. A hillside can move from green to gold while the valley below still looks like summer. A quiet lake can become a mirror before sunrise, then lose its reflections as the breeze arrives. The strongest photographs bring these changes together with a clear composition and light that suits the scene.
At Artistic Creationz, the connection between a landscape and its finished presentation matters. A photograph should offer something to explore beyond its first burst of color: atmosphere, depth, an inviting path through the frame. These practical choices help photographers make autumn images with that lasting presence.
Read the season before choosing your dates
Peak fall color is a moving window, not a guaranteed weekend. Latitude, elevation, tree species and local conditions all affect what you find. A mountain road may pass bare trees near its summit, brilliant foliage halfway down and green forest at its base. Build an itinerary around several elevations rather than a single famous viewpoint.
Shortening daylight helps initiate seasonal changes, while temperature, sunlight and moisture influence color and its duration. NOAA explains these weather influences; a calendar alone cannot predict an individual hillside. Check recent, dated reports from park staff and local visitor bureaus, then compare them with photographs from the same elevation.
Look beyond the advertised peak
Early color can provide a striking red tree against green surroundings. Later in the season, open branches reveal the structure of a forest and fallen leaves add patterns along streams. Strong wind or heavy rain may shorten a colorful canopy's life, but a leaf-covered trail can become the next subject. Allow room to respond.
Choose light for the landscape in front of you
Early morning: stillness, separation and first light
Arrive before sunrise so you can compose without rushing. A sheltered lake may offer calmer water, and low mist can separate a line of trees from the hills behind it. Scout legal access in daylight beforehand; reaching a shoreline in darkness is a poor time to discover an unstable bank.
Watch where the first direct light reaches the scene. Side light reveals ridges and tree trunks; backlight makes translucent leaves glow. Shield the lens from stray light and inspect bright leaf edges for clipping. Our guide to golden hour landscape photography explores how light direction changes a composition.
Late afternoon: warmth with a shorter working window
Afternoon light can enrich warm foliage and create long shadows that organize a hillside. In mountain terrain, the sun may disappear behind a ridge well before the listed sunset time. Plan for the local horizon, and have your composition ready before the light arrives. Stay attentive afterward: cooler twilight can balance the remaining warm tones beautifully.
Use overcast skies, fog and changing weather
Soft overcast light is excellent for intimate woodland scenes. It reduces harsh shadow boundaries and lets subtle differences between yellow, orange and red become the subject. Wet leaves may look especially rich, although glare can hide their detail. Exclude a featureless bright sky when it adds little to the photograph.
Fog simplifies a busy forest by gradually concealing distant branches. Find a distinct foreground tree and let successive layers fade. Your meter may render a pale scene too dark; try a small positive exposure adjustment while watching the histogram. Focus on a clear edge, and check sharpness when contrast is low.
Broken cloud can briefly illuminate one patch of forest while the background stays shaded. Set the composition, monitor the changing light and reassess exposure as it moves. Keep a rain cover and dry lens cloth accessible. Leave exposed ridges during thunderstorms, and avoid slick rocks and rising streams.
Compose with color, water and depth
Start by identifying one visual idea: an isolated red maple, a curve of yellow aspens, a reflection beneath a dark mountain. Too many equally bright elements compete for attention. Change your position until trunks separate, distracting branches leave the edges and the main color has room around it.
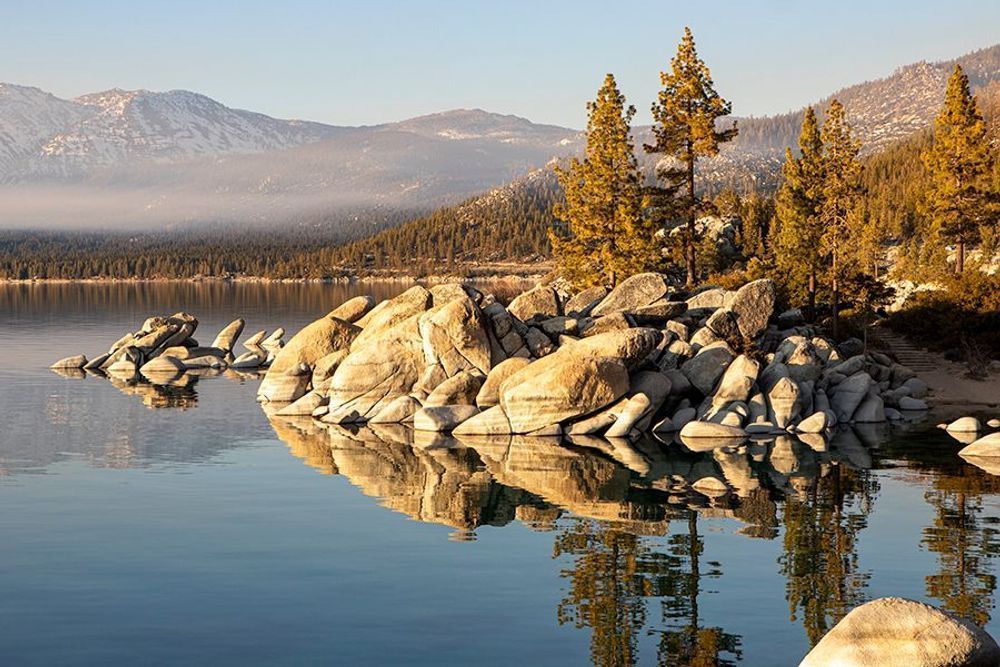
Use foreground elements deliberately. A cluster of leaves, a granite boulder or the curve of a stream can lead toward distant trees. Move close enough for that element to matter without letting it overwhelm the scene. Check both a low viewpoint and a higher position; a small change can remove an awkward overlap.
For reflections, compare a balanced, symmetrical frame with one that emphasizes either the trees or their mirrored shapes. A longer exposure softens ripples, but it will not restore a sharp reflection in choppy water. If a breeze spoils the mirror, look for abstract bands of reflected color instead. Explore our Lake Tahoe collection for different relationships between water, shoreline and mountains.
Build a practical camera setup
Use equipment you can carry comfortably and operate in changing light. A wide-angle lens helps connect foreground and distance; a normal zoom provides flexible framing; a modest telephoto isolates a colorful grove or overlapping mountain layers. Choose the viewpoint first, then the focal length that includes the right relationships.
- File format and aperture: Shoot RAW for editing flexibility. Around f/8–f/11 is a useful starting point for many landscape setups; inspect foreground and background sharpness rather than assuming one aperture solves every scene.
- Shutter speed and ISO: Begin near your camera's base ISO for still scenes. If leaves move, try roughly 1/125–1/250 second and adjust for the actual wind and focal length. Raise ISO when needed; a clean but blurred leaf is still blurred.
- Tripod and release: Choose a stable tripod that supports your longest lens, keep the center column low and use a timer or remote release. Follow your equipment's stabilization guidance when mounted.
- Filters: Rotate a circular polarizer while observing glare on foliage and water. Preserve reflections when they are the subject. Watch for uneven darkening across wide blue skies. Use neutral density only when you specifically want a longer exposure.
For moving streams, compare several shutter speeds: a fraction of a second may retain texture where a multi-second exposure becomes smooth. Our waterfalls and moving water guide develops that choice further.
Protect exposure and keep autumn color believable
Check the RGB histogram as well as the overall brightness histogram. Brilliant red or yellow foliage can lose detail in one color channel even when the scene appears reasonably exposed. Reduce exposure if important highlights clip. For a still, high-contrast scene, bracket exposures when necessary, recognizing that moving branches can complicate blending.
Set a consistent white balance as a starting point, then refine it from the RAW file. Keep shaded areas plausibly cool instead of warming everything. Adjust exposure and contrast before saturation; small, selective color changes usually preserve more variation than a heavy global boost. Inspect leaf texture and avoid halos along branches. A restrained file often holds a collector's attention longer than uniformly blazing color.
Plan a flexible autumn photography trip
Prepare one sunrise location, one woodland or waterfall option for overcast weather and an accessible alternative if a road closes. Confirm access hours, parking, permits and trail conditions with the land manager shortly before departure. Download maps, pack layers and spare batteries, and leave enough daylight for the return walk. Our photography tour packing guide helps organize a manageable kit.
For future guided experiences, explore Artistic Creationz Photography Tours and the destination concepts currently in development. To enjoy landscape imagery at home, browse our landscape photography prints. Whether you are composing in the field or choosing artwork for a wall, look for light, color and structure that continue to reward a second look.